Table Of Contents
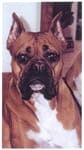

Blasting a halftone photo can be very intimidating, even to the experienced. That is why when I accepted a job to blast a memorial photo on a car window, intimidating would easily be considered an understatement. After all, this would be the first halftone I have ever blasted.
I work in the Custom Mask Art Department here at Rayzist Photomask where we provide custom photomasks to customers all over the country and beyond. We receive artwork from all types of sources and one aspect of my job is to make sure the artwork being received is appropriate for our medium. But one thing I often forget, because I don’t blast on a daily basis, is how durable our material actually is. I found that sandblasting was actually the easiest part of the job (more about that later), it was actually the setup that took the most time, thought, and energy.

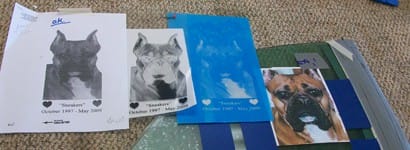
When I received the window, the customer had taped a photo to the glass for placement purposes.This was very helpful, however, I wanted to make sure that when I placed the mask onto the glass, that it was level and clear of any moldings when they put the window back into the car. This proved difficult because I was not 100 percent positive where level would be since the window was not square. Luckily, I did see that there were “glass identification” markings on the bottom of the window. I figured that would never be covered and it also would be level. It gave me a great reference and helped me place the mask at level. After aligning and re-aligning many times I was finally satisfied with the placement.
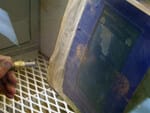
While sandblasting we are always concerned with the possibility of blast through. It can be a nightmare that I am sure you have encountered, or will encounter, at some point in your career. That is why every time I step up to the cabinet I am amazed how well our resist holds up and for how long it takes a beating. In my case, a window that would cost hundreds of dollars to replace, simply came out great. Using high quality masking is key, but what we also need to consider is that the other key to a successful project is using the proper tools and preparing the equipment for the appropriate blasting that we are doing. When blasting a halftone photo it is imperative that the pressure is turned way down. A concern is that dots might fly off. However, you do want to focus in on any dark areas to open them to make them brighter and to show more of the detail. I blasted at 30 PSI, and for the first couple passes stayed back a good 10 – 12 inches. After that I was able to focus in on the areas that needed more attention. In my case, the eyes and muzzle needed the most attention.
To prevent blast through I would definitely recommend blasting a test piece before you attempt the finished product. This gives you a sense of how long you can blast, where on the photo you might need to concentrate, and really how the finished image will look.

One of the contributing factors of the success of the project is definitely the fact that I did not rush through the process. That is one thing that I have learned over the years; if you want to do something right, you must take your time doing it. The saying, “measure twice, cut once” comes to mind. Also, “if something is worth doing, it is worth doing well.” It is very advantageous to sit back and think, or get another opinion.
You can tell that I was really pleased by the end result. However, in the future I will have the customer mark the edge of the moldings and of the bottom of the window sill. Even though I found a clever solution that worked in the end, it would have been beneficial to know. If you have never created or blasted a halftone line screen, I hope this has been an inspiration to venture out and try something new. Creating halftones from photos takes some trial and error, but I assure you that it is worth the time it would take to learn. Quality photoresist, the right equipment and setup, and a patient pursuit add up to successfully blasted pieces. Your customers will greatly appreciate your ability to create very personal, one-of-a-kind items.