No products in the cart.
Back to Blog
Table Of Contents
Engraved Photos
Save as you go but remember to try not to over write what you have done below.
All settings depend on the type of photo you are given so it will not always be the same as what I have done.
When you do the settings below you will end up “messing up” the photo that is intentional to bring contrast out.
Step 1: Open photo into Photoshop / Duplicate photo / Turn off original photo aka Layer 1. Layer 1 will always be your back up of the photo in case you want to restart.
Step 2: Filter / Neural Filter… / Photo Restoration
If you feel like the settings need to be altered then you can adjust them.
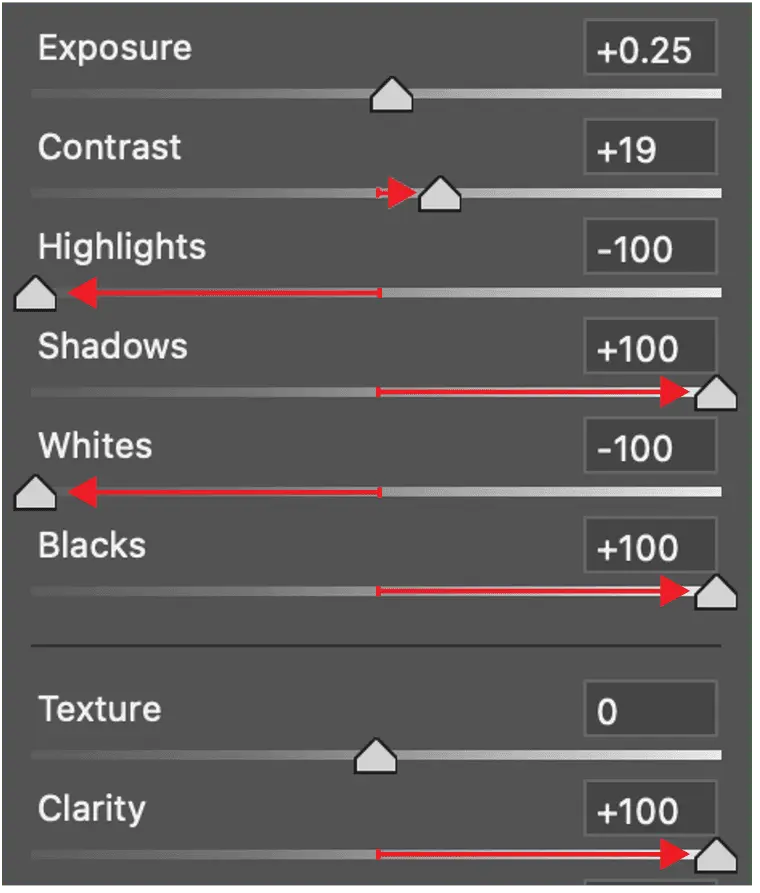
Step 3: Filter / Camera Raw Filter…
Basic
Clarity – Move all the way right
Black – Move all the way right
White – Move all the way left
Shadows – Move all the way right
Highlights – Move all the way left
Contrast – Move right but depending on the photo it could be left. With this setting I move in slow increments to see how it affects photo.
Exposure – Depending if the photo is too dark then I lighten it up.
If the photo is too light, I darken it.
Detail
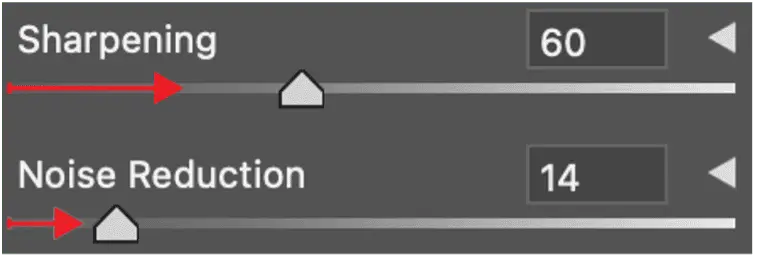
Sharpening – I move this setting slightly further to the right Noise Reduction – I try not to move to far to the right
Color Grading
I only use this filter sometimes.
Step 4: Cropping and making it the size they request.
Step 5: Fill in or fix any perfections of the photo
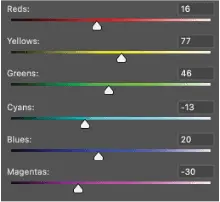
Step 6:Add B&W filter and adjust each color.
Note: Red and Yellow will affect the face.
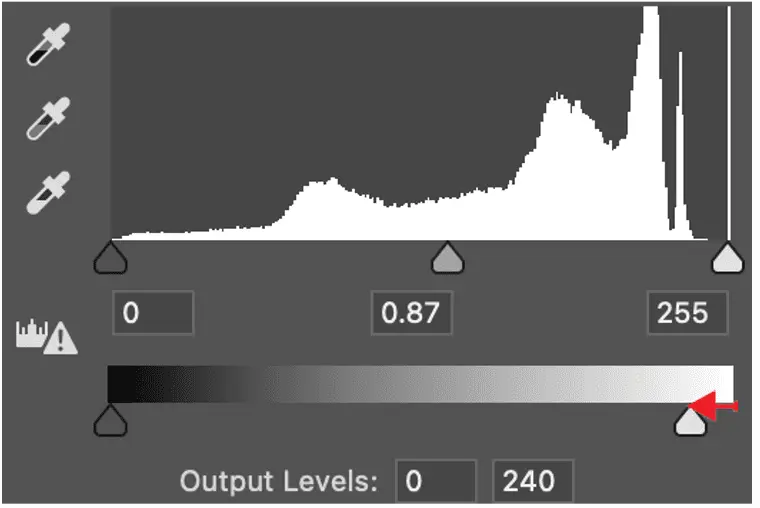
Step 7: Add levels and move the white slider over to the left a small amount.
By moving the white slider over to the left it will help with the areas that are white to not be 100% white. So that the dots in those areas will show up better.
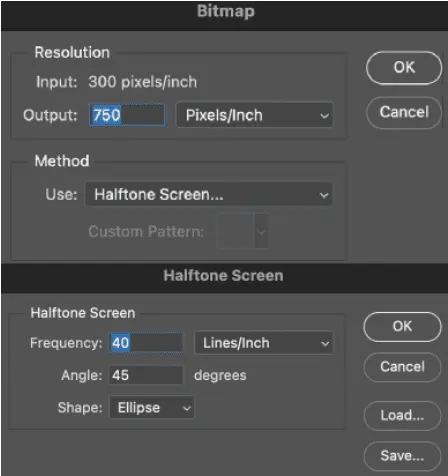
Step 8: Apply the BMP settings to the photo.
- Image / Mode / Grey scale / Merge / Discard B&W
- Command “I” to invert
- Image / Mode / Bitmap / Click Ok
- Output: 750 / Halftone Screen / Click Ok /
- Frequency: 40 / Lines inch / Angle: 45 / Ellipse / Click Ok
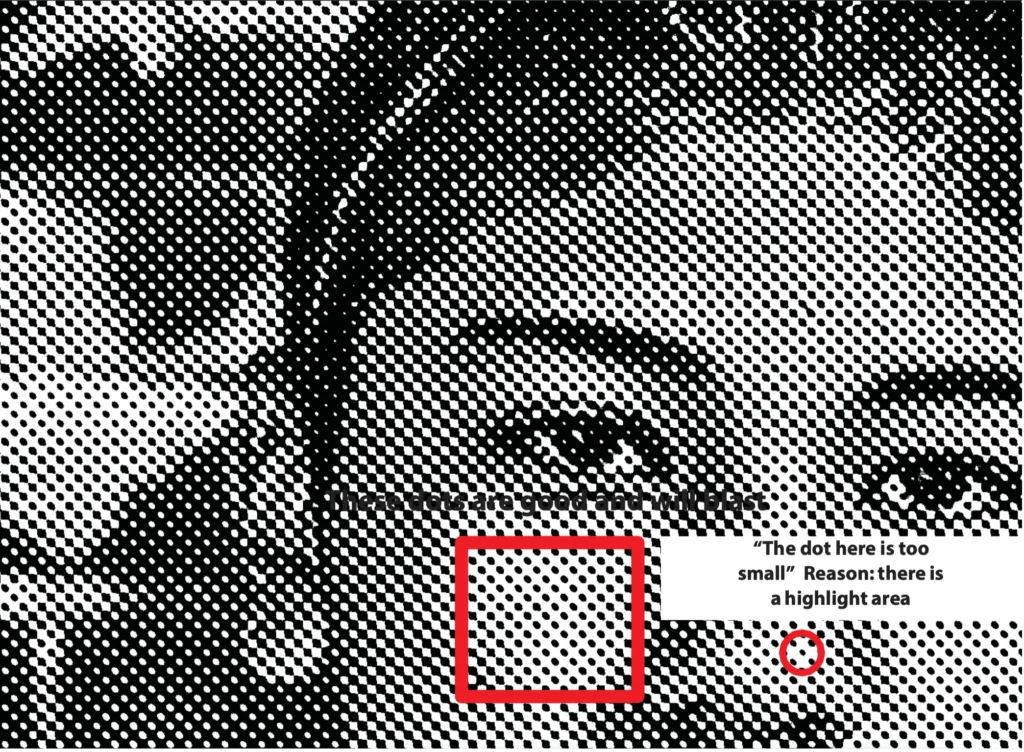
Step 9: Command “I” (Invert) / Zoom in / Check the dot pattern to make sure the dots are big enough. White areas are more important. If you need to adjust anything Command Z (Undo) until you see all of the settings that you have made previously.
Share