Table Of Contents
Avoid Pitfalls and Grow Profits
Handled properly, optic crystal can be a big profit generator for your business. A flawless, premium material, optic crystal commands mark-ups of five times or more. We have had more than a few customers excited to receive their first large optic crystal job, only to find that the pieces had been scratched or damaged during sandcarving. This damage generally results from mishandling, but it’s easy to avoid when you take the proper precautions.
Characteristics of optic crystal
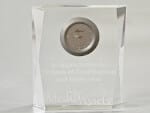
Optic crystal is clear, lead-free, and exceptionally hard. Because it is typically hand-polished and cut with jeweled, facet edges, optic crystal has a very high perceived value. It is ideal for sandcarving, because the etch is magnified through the crystal. The drawbacks are that optic crystal is prone to scratching and, due to its clarity, the scratches tend to be very visible.
Step 1: Create a clean, carpeted production work area
You will need a carpeted work table to protect your crystal while you are prepping it. The soft fibers of the carpet will decrease the risk of scratching during preparation. Also, be sure to keep the sandcarved items separate from the pieces you are prepping. The sandcarved items will bring abrasive residue into your work area and increase the risk of scratching.
Step 2: Inspect your crystal blanks
Always inspect your crystal within a few days of receiving your blank order. If you skip this step, you won’t be able to determine the source of any scratches.
Step 3: Prepare a production area
Set up an efficient process to protect the non-etched sides of your crystal with transfer tape. You can purchase transfer tape from a packaging/shipping supply company. We recommend transfer tape because it is faster to tape-off and it protects the crystal from debris or abrasive on your work table.
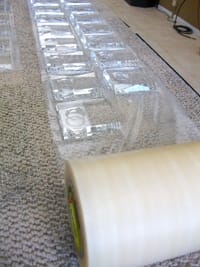
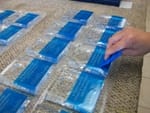
- Roll out long sheets of transfer tape on the carpeted table, with the adhesive side up.
- Remove each crystal piece from the box and place it, etched side up, on the sheets of tape. Make sure you lay out all of your blanks and space them evenly apart. In doing so, you can complete the taping more efficiently.

Note: When blasting clocks, remove the clock faces and put them back in their presentation boxes so they don’t get lost.
Step 4: Cleaning the crystal and applying photomask
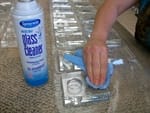
- You’ll want to clean each piece of crystal with a glass cleaner and a clean, soft cloth. We recommend Rayzist Blotting Towels for Optic Crystal. Wipe all the pieces at the same time.
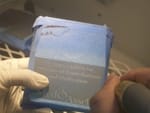
- Apply the photomask to each piece and burnish the mask to the crystal. Be sure to rub only the photomask, and not the exposed crystal.
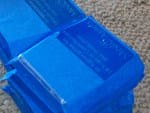
- Remove the clear carrier on all of the photomasks and cover the front of each piece with blasting tape.
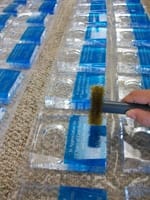
- Roll the wire wheel brush over the photomask to release any air trapped between the photomask and crystal.
- Cut the transfer tape between the crystal pieces with a razor or X-Acto knife. The transfer tape should fold up over each side of each piece and cover the entire blank.
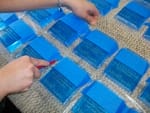
- Apply four small strips of blasting tape to ensure no abrasive will work its way through the edge of the transfer tape.
Step 5: Blasting your crystal
Having a routine production flow will help you work more efficiently and minimize mishandling. If you are using a Rayzist system, stack your crystal pieces inside the cabinet through the left door and set air pressure to 30psi with a 3/32 carbide nozzle. As you complete each piece, move it to the right side of the cabinet, creating a second stack with the blasted crystal items.
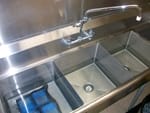
Step 6: Prepare a wash station for sandcarved pieces
It is very important to rinse your etched crystal thoroughly and properly, because leftover abrasive residue can cause scratching. Before you remove any tape, set up an area for the rinsed, sandcarved pieces by spreading out blotting towels on the carpeted table. After rinsing, you’ll place the clean, wet etched pieces on the blotting towels.
Ideally, you should have three sinks ready with warm water. Each sink should be lined with a spongy mat to protect the crystal from nicking or scratching against the basin bottom.
- The first sink of warm water is used to remove the loose abrasive from the blasted item. Hold the crystal item and swirl it around in the first sink. Then, set it down inside the sink for a few minutes to allow the water to loosen the photomask and tape.
- Place the rinsed crystal in the second sink and remove the photomask.
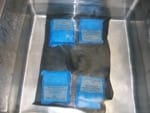

- After you remove the photomask and tape, place the item in the third sink for the final rinse. If you allow the crystal to sit in warm water for a few minutes (or longer), the remaining bits of photomask and tape will come off easily.
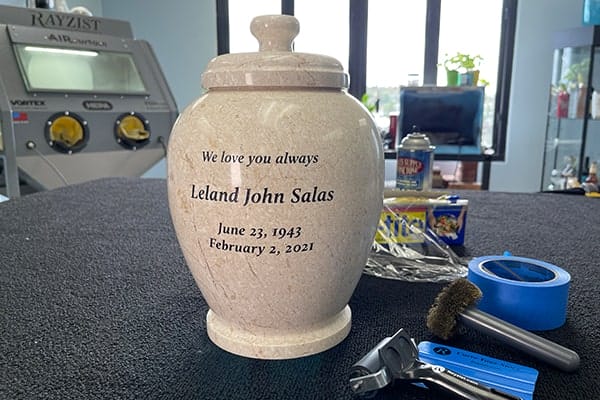
Place the rinsed crystal pieces on the blotting towels, and then each one with a glass cleaner and soft cloth. The final step is to place each etched piece into its presentation box.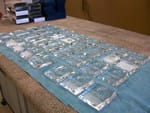
- Optic crystal is an ideal choice for sandcarved corporate awards and gifts for many reasons. First, the etched design and lettering look stunning on optical crystal, second, the return that it yields is profitable and lastly, your customers will appreciate that they have received a high quality, commemorative piece that will last a lifetime.